Showing posts with label Valentines. Show all posts

Monday, February 14, 2022

Many, Many Valentines

 Hi all! - Happy Valentines Day!

Today I thought I would share with you some of the Valentine cards that I've been making for my grand kiddos.  Three of them live in Colorado, so I need to get a wiggle on to get them out, along with their treats.  Since I have 5 grandchildren, I felt I needed to make a couple of different Valentine cards.  

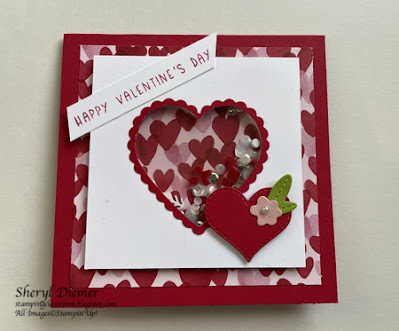
Here is card #1 - cute and more cute!


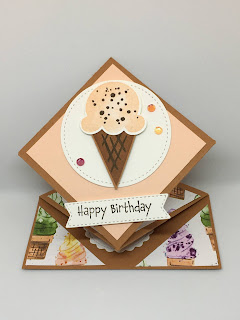
Here is Card #2


I got the idea for the flip card from fellow Stampin'Up! demonstrator, Brenda Quintana.  Here is the link to her original post and video;  https://www.qbeesquest.com/2021/04/sweet-ice-cream-flip-cards.html


Card #3:  A turtle card:


I also made some cute heart boxes - from instructions created by Brenda Quintana (https://www.qbeesquest.com/2022/01/small-heart-shaped-boxes-tutorial.html).  I changed it up a little by using the Sweet Talk designer series paper on my lid sides.  Two dark chocolate dove heart shaped candies fit perfectly in the box!


Here are some more Valentines that I made:


See my blog post of February 9th for a video on how to make this card

I'm exhausted.  Almost as bad as Christmas as far as how many cards I've made.  Now to send them out!

Hope you enjoyed my Valentine inspirations.   Have a happy Valentines Day!

Thanks for stopping by.


Blessings,  Sheryl


Thursday, February 10, 2022

February 2022 Stray Duck Waddle - Love is in the Air!

 Welcome to our February 2022 Stray Duckling Waddle!  We are hoping to inspire you to make some beautiful cards and 3-D items for Valentines day!


Today I'm showing you a really quick and easy and cute Valentine Treat Holder.  In fact I made 15 of these for my granddaughters pre-k class.  Here is a what 2 of them looked like:


Here is a video showing you how I made these adorable treat holders:


Here is a close up of how to do the 2nd and 3rd folds:


And here is a photo of all the treat holders I made for my granddaughters class:


Waddle on over to  Lori Helvick to see more beautiful Valentine projects!

Here is a list of this months participants:


Hope you enjoyed today's project.  

Blessings,  Sheryl


Product List


Wednesday, January 12, 2022

January 2022 Class is Now in Session!

 Hi all!

Due to the spike in COVID cases here in Central Illinois, plus, I've had a very bad non-COVID cold, I'm going to be moving my monthly classes to on-line for the next couple of months.  

It's wintry and blustery here, so what better way to get out of the after Christmas doldrums but to make cards!  Especially cards that have hearts, rainbows and flowers (plus a turtle).  And, they feature several items from the new January - June Stampin'Up! Mini catalog!  Woo-Hoo!  

Here are the cards:


I'm really changing things up this month.  I will be doing free tutorial videos on each one of these cards.  I am also going to be offering for sale the supplies to make these 5 cards:  precut card stock and embellishments.  Sorry, can't stamp them for you, but you can get the supplies and use whatever stamps you have on hand to complete them.  A challenge!  Let's see how creative you can get. 

Cost of the card kit supplies is $15, plus $2 shipping and handling.  Just let me know if you are interested.  I am going to begin the videos this week (please give me a few days...I still have a terrible cold and don't want to have a coughing fit right in the middle of filming!  I will post on my blog when the videos will be available.  They will appear here as well on the My Stamping Classroom YouTube channel.  

Let me know if you are interested, or you can just watch the video's.  

Blessings,   Sheryl

Wednesday, February 10, 2021

February 2021 Stray Duckling Blog Waddle - Love is in the Air!

 Hello all!

Welcome to your monthly inspiration from the Stray Ducklings!  This month we are all about romance and love - Hello Valentines Day!


I'm really excited to show you what I've been up to.  You may or may not know that I have been cleaning out my stamp room.  I'm getting some new furniture to organize everything.  Of course I have lots of old stuff and one of the things I ran across was a valentine card that I made at the start of my love of Stampin'Up.  Now when I became a demonstrator I didn't know ANYTHING!  So I watched lots of videos and took classes.  I made this card from one of the video's I watched.  I don't remember whose this is;  it was either Dawn Griffith or Angie Juda - those were the only 2 who really had video's back in the day, before YouTube took off.  So here is the original card:


It's called a Diamond Pop-Up Card....and I can't stop making them!  Here are the two Valentines that I made:


I'm going to make a video on how to make these little darling cards, so stay tuned! For now I have a free PDF for you to download.  It's a differently decorated card, but it shows you how to cut and score this card.  Here is the card with the instructions:  Click on the image to access the PDF.


Another Valentine that I made was inspired by my Stray Duckling group - Mystery Card Monday.  This is called an arrow card and I used the True Love Designer series paper and the Heart Punch Pack as well as the Ornate Floral 3-D embossing folder.  Here is that card:


Pretty cool, huh?

I hope you enjoyed my cards.  


The next stop on your blog hop is:  Nancy Legate

Here is a list of everyone who is participating:

Kim Baker
Sheryl Diemer
Nancy Legate
Lori Helvick
Sue Boerner

Blessings,   Sheryl


Tuesday, January 31, 2017

Valentine Treat Holder #3 - The Bag-A-Lope

Good Morning Stampers!

Today is Valentine Treat Holder project #3 - the Bag-a-Lope! I first saw this idea on a video made by Dawn Griffith, at Dawn's stamping thoughts.net.

So, I thought, why not for Valentines Day!  Here are some samples of my little bags:


Here are the instructions:


  • You will need a paper cutter that both scores and cuts
  • You will need a bone folder, and strong adhesive like Fast Fuse or glue dots, or the Tombow liquid glue (you have to hold it in place for a second or 2)
  • Stamps and ink; Other items you feel so inclined to decorate with - let your creativity out of the box!
  • Take an A2 Stampin'Up Envelope, white or very vanilla.  You can use the Crumb Cake envelopes, but they are thicker than the Whisper White and take a little more manipulation to get them to cooperate.  For your first few, I would practice on the white, then graduate to the crumb cake.  
  • Score at 1" on 3 sides - 2 long and 1 short. 
  • On the other short side, cut off 1" (envelope will be in the landscape position on the cutter)
  • Seal the envelope flap down with adhesive, making sure you go to the edge and that you just put adhesive on the glue portion of the flap.  Any deeper than that and the bag won't open up correctly,
  • Fold and burnish on all three score lines, folding and burnishing in both directions
  • To make bag, place hand inside of envelope and spread it out.  With your other hand, gently tap the bottom until it folds on the score lines - you will form 2 triangles at each end.
  • Glue the triangles down for a flat bottom
  • Decorate to your heats content!
  • Handle is a 3/4" x 8" piece of whisper white card stock (or crumb cake if you are doing a crumb cake envelope).  Stamp before putting on the bag
  • Using the bone folder, curl this paper and put adhesive on each end. Adhere to the inside of the bag on each end.
I have a video for you, showing you how to make this.  Dawn Griffith also has a video which is much better.  I have the personality of a snail when I tape video's.  I think I may have a career as a golf announcer!  I applaud all those Stampin'Up Demonstrators that do such a wonderful job making videos!  I'm not one of them!  Anyway, my video gets the job done so here it is:  


Hope you enjoyed my series of 3 Valentine treat bags!  I really enjoyed showing them to you!

Here's a picture of someone who will receive a little treat from me - baby friendly - no chocolate:
This is little Alice Rose and she's 7 months old today:  Love the hair!


Until later, have a Blessed Day!

Sheryl

Monday, January 30, 2017

Valentine Treat Holder #2 - Pinwheel Treat Holder

Good Morning fellow stampers!

As promised, here is project #2 - Pinwheel Treat holder.  I even have a video, which I must apologize for in advance.  I have zero personality on these videos.  Of course I was filming it at 11:00 at night.  The dog has been put to bed, as has the husband.  So, it's pretty quite.  I think that's why I spoke so softly - I was afraid of waking everyone up!

I received the instructions for this from Mary Booker!  She's a treat holder ninja!  Thank you Mary for sharing this with us!

Anyway, here are the measurements and instructions for making this cute and easy treat holder:


Paper:    Designer Series Paper (I used Sending Love DSP Stack) - 6 x 6
              Whisper White Card Stock - 3/4" x 8"
              Scrapes of Real Red and Red Glimmer Paper

Tools:  Envelope Punch Board, Simple Score Scoring Tool,  Adhesive, bone folder

Directions:

  • Take 6 x 6 DSP and with right side up, use the envelope score board.
  • score on all 4 sides at 2-5/8".  Do not use the punch!
  • After scoring, fold on all 4 score lines.  
  • You will see that there are small triangles formed where the 2 score lines intersect, per side. Trim out where lines intersect.  
  • Once the triangles are cut out, take the DSP and place it, wrong side up on the Simply Score, scoring tool and score at 3/4" to the notch (stop where triangel cut out begins)  Do this on all 4 sides.
  • Once this is score, fold back the 3/4" flaps, fold forward the score lines that were made at 2-5/8".
  • Fold each side, going clock wise.  The last flap tucks in.  
  • For Belly Band:  
    • put candy in the pinwheel treat holder
    • Take belly band and wrap around to the back, pinching the folds-trim back if necessary
    • Take off the band and stamp and decorate 
    • Add Adhesive to back band and wrap around treat holder, making sure it's loose enough to slide off.
  • Your project is now complete!
And now the video to further confuse you!


Here are some other pictures of how I decorated this little gem:


Hope you enjoyed todays project!  Go and make a few!  If you wish to order any of today's supplies, they are listed below.  Just click on the image and it will take you to my on-line store.

Coming soon!  Last, but not least, is #3 treat holder: the bag-a-lope - a cute little bag that you can make from Stampin'Up!'s A2 envelopes. Add a handle and a bag of treats and you are ready to go!


Until later,

Sheryl


Friday, January 27, 2017

Valentine Treat Holder #1 - Miniature Cup

Good Morning!

I'm finally delivering on those treat holders I've been talking about.  I'm going to do a series of 3 videos (yes. me and video) on how to make 3 different treat holders for Valentines Day.

The first treat holder is the minature cup made out of Designer Series Paper:


The idea for this came from one of my fellow demonstrators, Mary Booker.  She had found a video on these cups, posted by My Paper Oasis.  Mary changed the dimensions slightly so we could get 2 cups out of a 6 x 6 piece of designer series paper.

Here is are the measurements:

Cup:
- DSP - 5-3/4 x 3
- On long side, score at 7/8", 1-3/4", 2-5/8", 3-1/2", 4-3/8", 5-1/4"
- On short side, score at 1" and 2-1/4 "

Handle :
 - DSP - 1/2" x 3"

All the supplies are listed below.  Hint:  When scoring, the side that is up is the side that will be facing outward on the cup.  Also, you want to cut the paper so that the words are right side up.  The 1" side is the bottom of the cup, while the 3/4" side is the top.  This is explained in my video.  Now what you have all been waiting for:


Making a video is a lot harder than it looks.  So be kind!

Next up is a post and video showing how to make these cute pinwheel treat holders:


 Until next time,

Happy stamping!

Sheryl


09 10